> ## Documentation Index
> Fetch the complete documentation index at: https://docs.sightlinebehavior.com/llms.txt
> Use this file to discover all available pages before exploring further.
# Get started with Sightline
> Open Sightline, try a supplied sample, or save your first observation.
Sightline keeps the steps of an observation together: choose what to record, collect the data, review the results, and write about what you observed. Your records are stored on your computer.
Follow the steps below to save your first observation. You can optionally explore the sample caseload first.
## Open Sightline for the first time
When you first open the desktop app, read and accept the terms, then choose whether to share optional analytics and crash reports. You can change those choices later in **Settings → Privacy & Data**.
Next, choose how to begin:
* **Continue with Community** lets you record observations and export their raw data as CSV.
* **Start trial** gives you 21 calendar days of Pro, starting when you select it. Each computer can have one trial.
* **Enter key** activates a license you purchased or received from your district.
Starter and Pro include saved results, charts, student workspaces, and document exports. Pro, including an active Pro trial, also includes AI writing tools. See [Licensing](/licensing) for plan and activation details.
## Look around with sample records
This is optional. To record your own observation, continue to [Prepare your first observation](#prepare-your-first-observation).
To explore the app, turn on **Demo mode** in **Settings → General**. If your caseload is empty, you may also see **Try the demo caseload** in the sidebar.
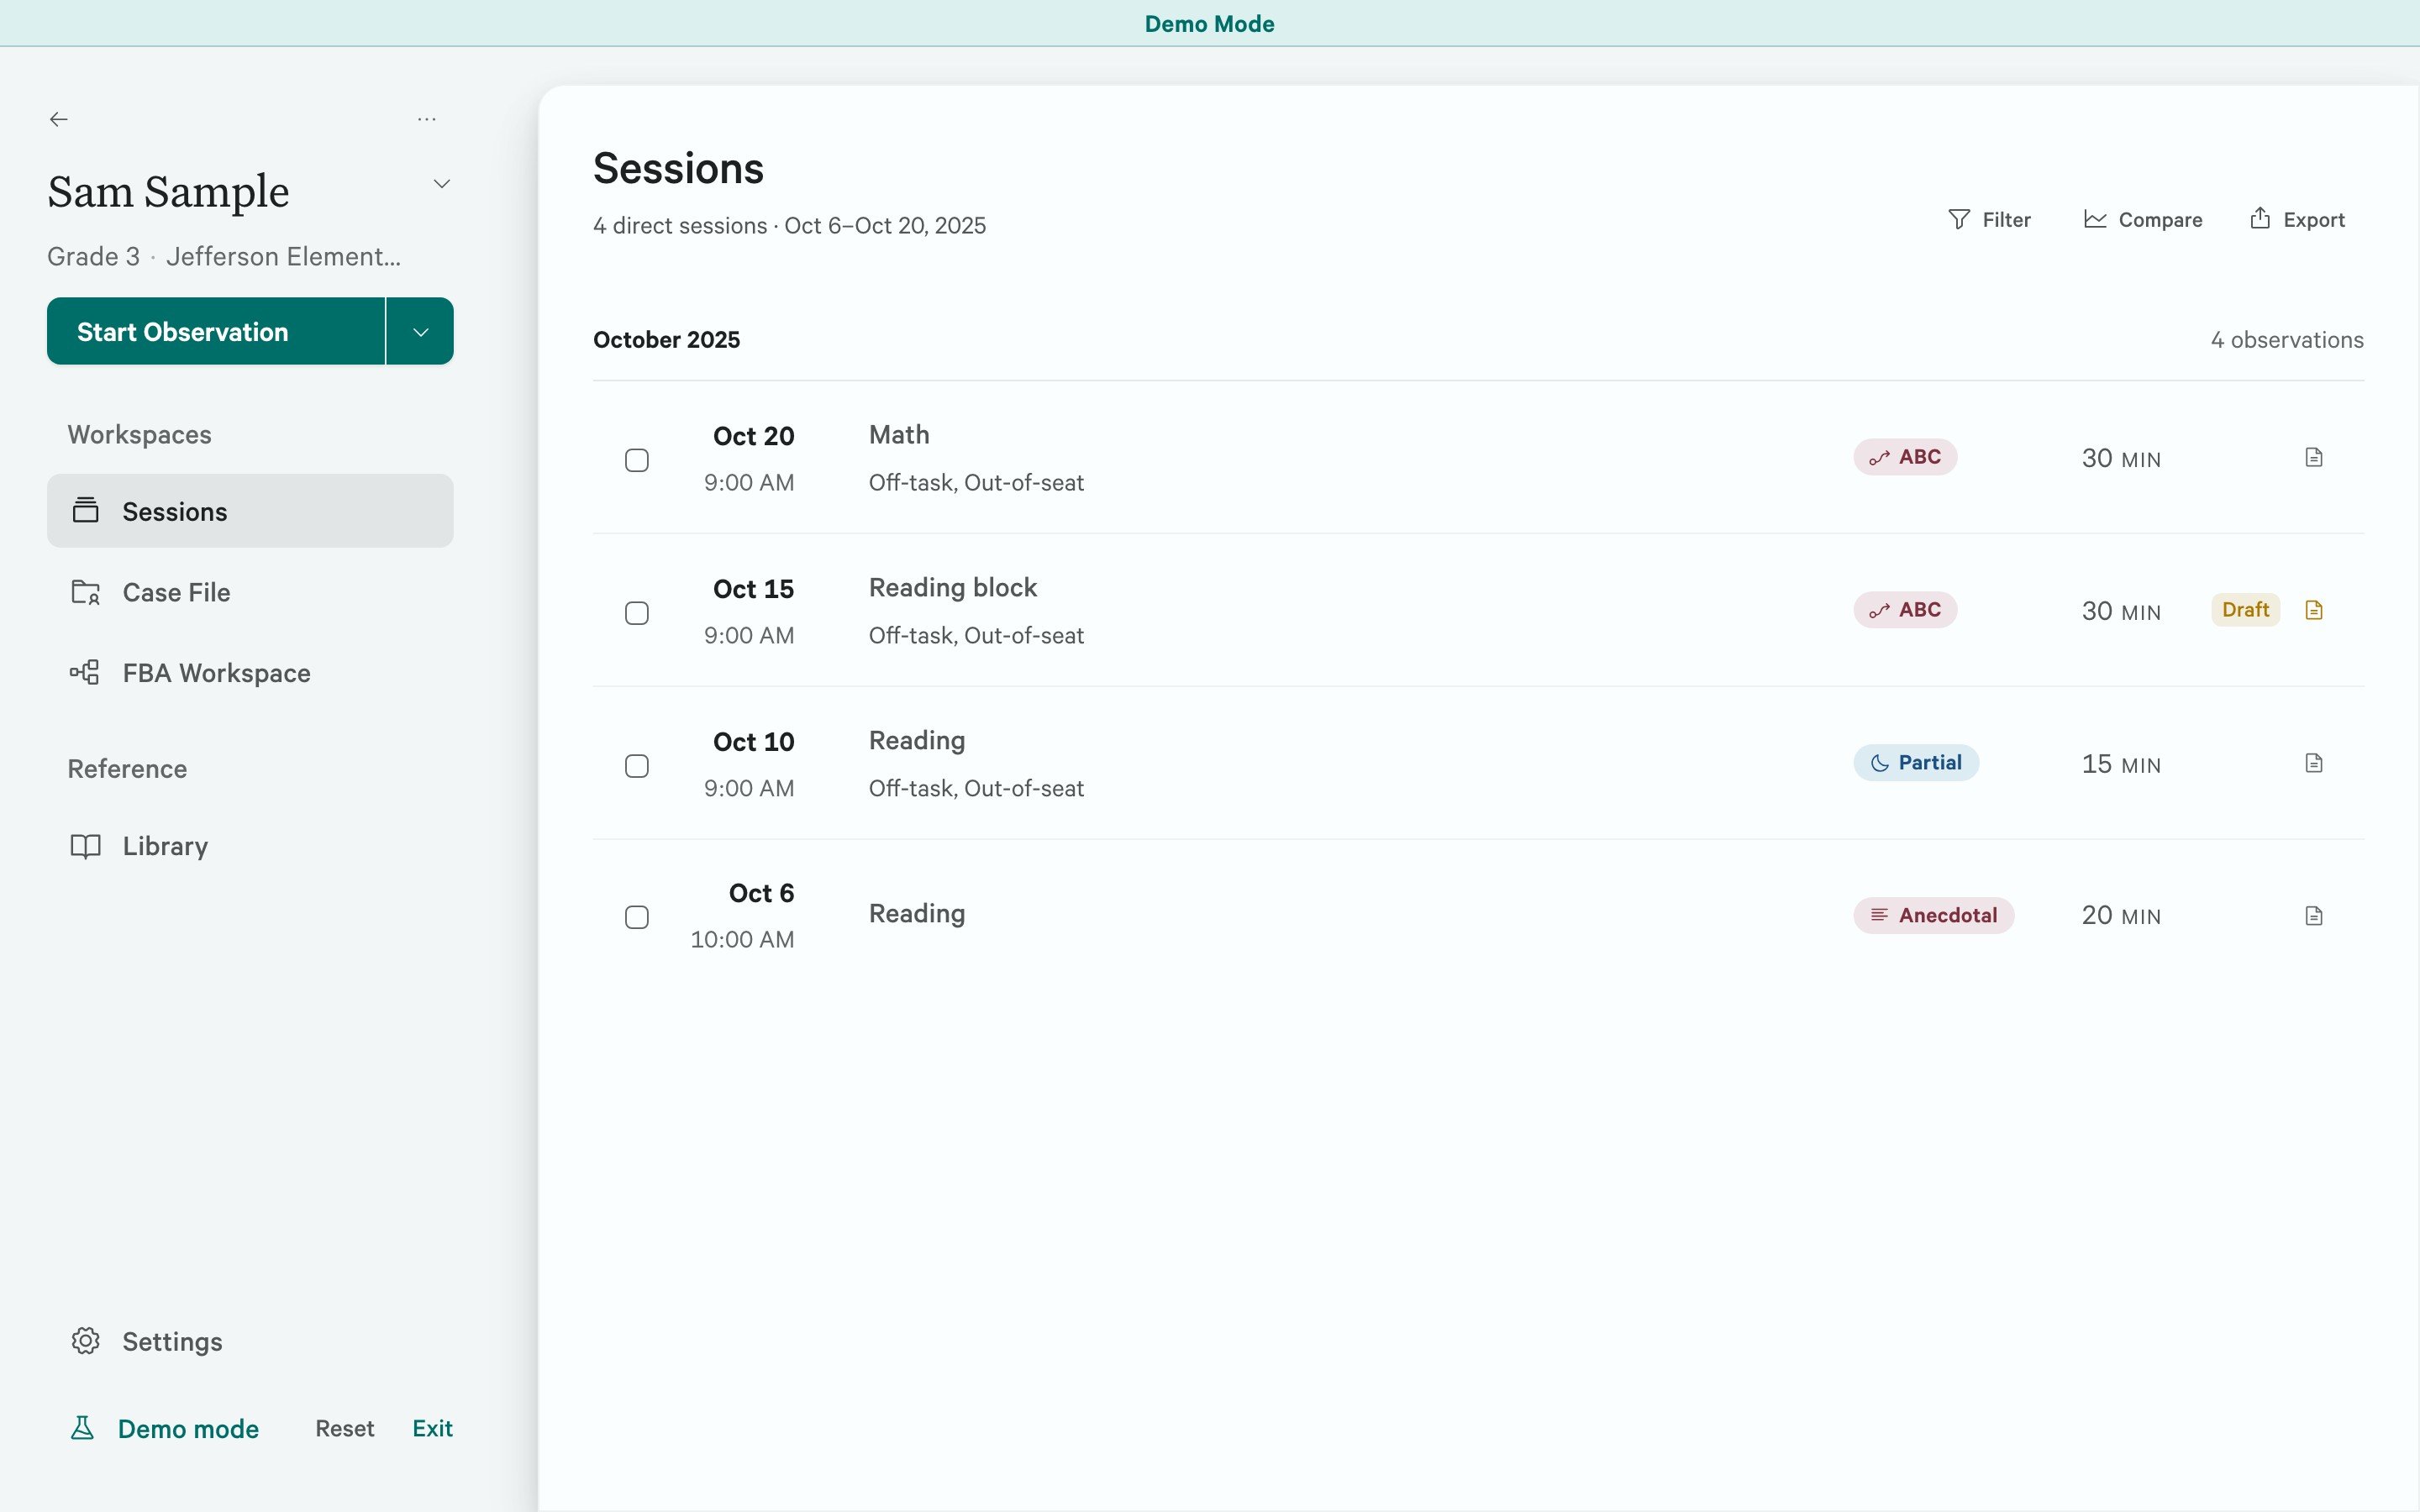
Open a sample student and one of their observations to see how the recorded data appears in Results. Open **Write-up** to read or edit a sample draft. A sample write-up is already written; opening it does not generate new text or test AI on your computer.
Your real caseload is hidden while demo mode is on. Turn demo mode off before adding your own students or recording real observations. Use **Reset demo data** in General to restore the original sample records after exploring.
 ## Prepare your first observation
With Starter, Pro, or an active trial, select **Add student** from the caseload, enter the student's details, and save. Open the student, then select **Start Observation**.
With the free Community plan, select **New observation** and enter the student's name in the setup window.
Choose a recording method and enter the behaviors you intend to observe. You can use your own behavior names and definitions or browse the library. Add the setting and teacher, then review the timing and options on the left.
Select **Begin** when the setup is ready. This opens the recorder. Use **Start** when you are ready to begin observing.
For the available methods and setup choices, see [Set up an observation](/observation-setup).
Use the on-screen controls to record what you observe. The controls depend on the recording method you chose.
Select **Pause** to stop the observation clock, then **Resume** to continue. If a latency trial is running, complete or cancel it before pausing.
When you are finished, select **End** and confirm. Add any final **Context** notes on the completion screen.
With Starter or Pro, choose **View Results** to save and review the observation now, or **Review later** to save it and return to your students. With Community, choose **Save observation** or **Download CSV**.
See [Record an observation](/recording) for the recording workflow and [Review observation results](/results) for reading and correcting the saved record.
On Starter or Pro, open the student’s **Sessions** and check the saved observation. On Community, check the saved observation in the home list and use its CSV export to review the recording data. Follow any save warning before leaving the recording or Results screen.
## Write up and keep a backup
From a saved observation's results, select **Write-up** to write with the recorded results alongside you. You can write manually with Starter or Pro. AI is optional and requires [AI setup](/ai-setup) and Pro.
Before exporting a document, add your name and credentials in **Settings → General → Report header**. Follow [Back up and restore your data](/backup-and-restore) to keep a separate copy of your records.
## Continue with Companion or writing
Choose a next step when you are ready:
With Pro or an active Pro trial, score nearby or prepare an observation to record away. Start with the Companion requirements and pairing guide.
Describe the recorded findings with the right measures, context, and qualifications.
This documentation is built and hosted on [Mintlify](https://mintlify.com), a developer documentation platform.
## Prepare your first observation
With Starter, Pro, or an active trial, select **Add student** from the caseload, enter the student's details, and save. Open the student, then select **Start Observation**.
With the free Community plan, select **New observation** and enter the student's name in the setup window.
Choose a recording method and enter the behaviors you intend to observe. You can use your own behavior names and definitions or browse the library. Add the setting and teacher, then review the timing and options on the left.
Select **Begin** when the setup is ready. This opens the recorder. Use **Start** when you are ready to begin observing.
For the available methods and setup choices, see [Set up an observation](/observation-setup).
Use the on-screen controls to record what you observe. The controls depend on the recording method you chose.
Select **Pause** to stop the observation clock, then **Resume** to continue. If a latency trial is running, complete or cancel it before pausing.
When you are finished, select **End** and confirm. Add any final **Context** notes on the completion screen.
With Starter or Pro, choose **View Results** to save and review the observation now, or **Review later** to save it and return to your students. With Community, choose **Save observation** or **Download CSV**.
See [Record an observation](/recording) for the recording workflow and [Review observation results](/results) for reading and correcting the saved record.
On Starter or Pro, open the student’s **Sessions** and check the saved observation. On Community, check the saved observation in the home list and use its CSV export to review the recording data. Follow any save warning before leaving the recording or Results screen.
## Write up and keep a backup
From a saved observation's results, select **Write-up** to write with the recorded results alongside you. You can write manually with Starter or Pro. AI is optional and requires [AI setup](/ai-setup) and Pro.
Before exporting a document, add your name and credentials in **Settings → General → Report header**. Follow [Back up and restore your data](/backup-and-restore) to keep a separate copy of your records.
## Continue with Companion or writing
Choose a next step when you are ready:
With Pro or an active Pro trial, score nearby or prepare an observation to record away. Start with the Companion requirements and pairing guide.
Describe the recorded findings with the right measures, context, and qualifications.
This documentation is built and hosted on [Mintlify](https://mintlify.com), a developer documentation platform.