

Choose what to export
Export one observation
Open the observation’s results, then select Export and choose Document…. Use Document on the left to choose the available content, such as Operational definitions, Session results, and Appendix for the raw records. Add a chart from Charts if useful. Check the preview to see what your selections include. To export text you wrote yourself, use the write-up export.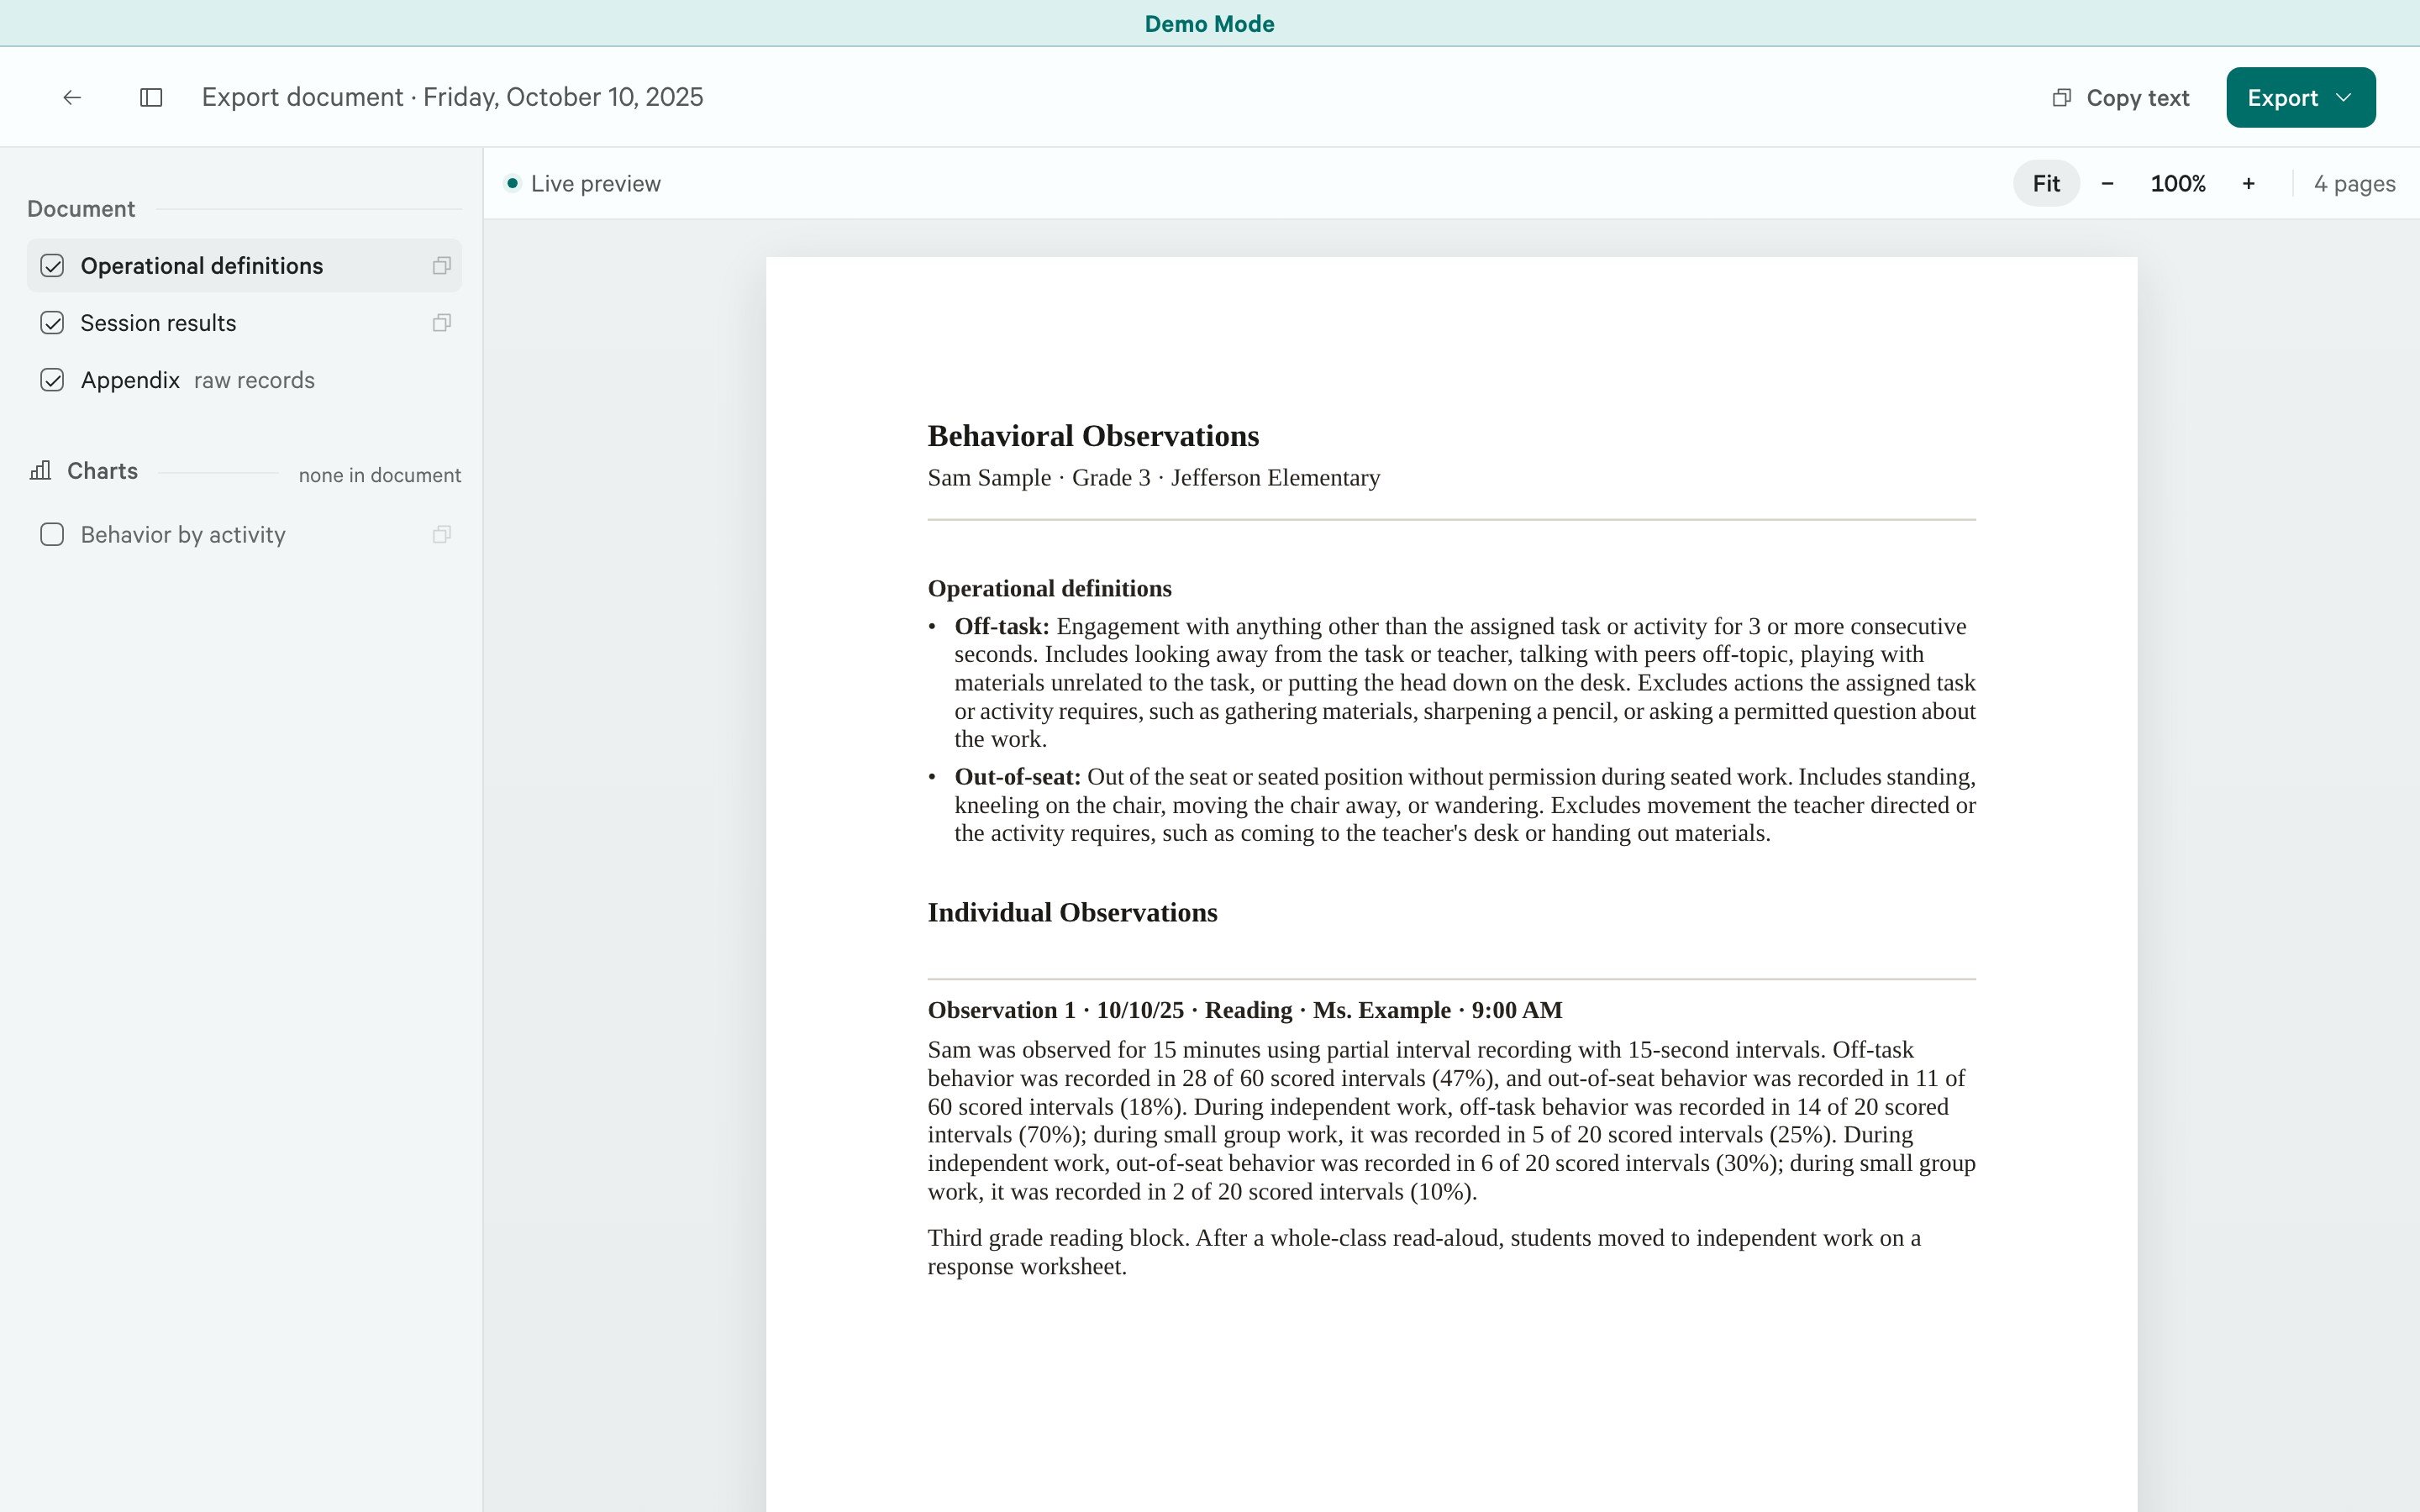
Select document content and charts on the left, inspect the live preview on the right, then choose a file format from Export at the upper right. Shown with sample data.
1
Choose what to include
Use Document on the left to choose the sections you need. Include Appendix if you need the raw recording details.
2
Select the content
Use the remaining controls on the left to add the available tables and charts. Read the preview as you change your selections.
3
Review and export
Read the preview, then select Export at the upper right and choose Word document or PDF. Choose where to save the file, then open it to check before sharing. The preview is always a PDF; check the saved Word file for its final layout.
Export several observations
Open the student’s session list and select the observations you want. Open Export in the selection controls, then choose Export document…. To start with all the student’s sessions, use Export sessions without selecting individual rows. In the export workspace, check the Observations list. Clear an observation’s checkbox to leave it out of this document. This does not delete the saved observation. Choose the sections, tables, and charts, then review the full preview. Cross-session material needs more than one included observation. When methods or behavior definitions differ, read the resulting sections carefully before treating their measurements as comparable.Copy part of a report into another document
In the document export workspace, use the copy control beside a section, table, or chart to place that item on the clipboard. Paste it into Word, Google Docs, or another document editor. The copy control at the top copies the report’s prose and tables together. Charts are separate: copy each chart from its row on the left. Check the pasted result, as the destination editor may change fonts, spacing, or table layout.Export your write-up
Open the observation’s Write-up, then use its Export menu.- Copy Formatted copies the document body with formatting for pasting into a document editor.
- Copy Plain copies the document body without formatting.
- Export document… opens the PDF and Word export workspace, where you can add the available supporting tables and charts.
Export text or CSV
For a plain-text version of a session’s results, select Export → Text in Results. This saves a text file; it is separate from copying the prose in the Write-Up Workspace. For recording data to open in a spreadsheet, choose Export → CSV in Results, or Export CSV in the session list. With Community, use the observation’s menu in the home list, or Download CSV immediately after recording. Each method supplies the fields appropriate to its record. CSV files can contain two kinds of time:- Timestamp: the clock time of the entry, in your computer’s local time. A blank means no clock time was recorded.
- Elapsed time: time measured from the beginning of the observation, where provided. Untimed entries remain untimed.