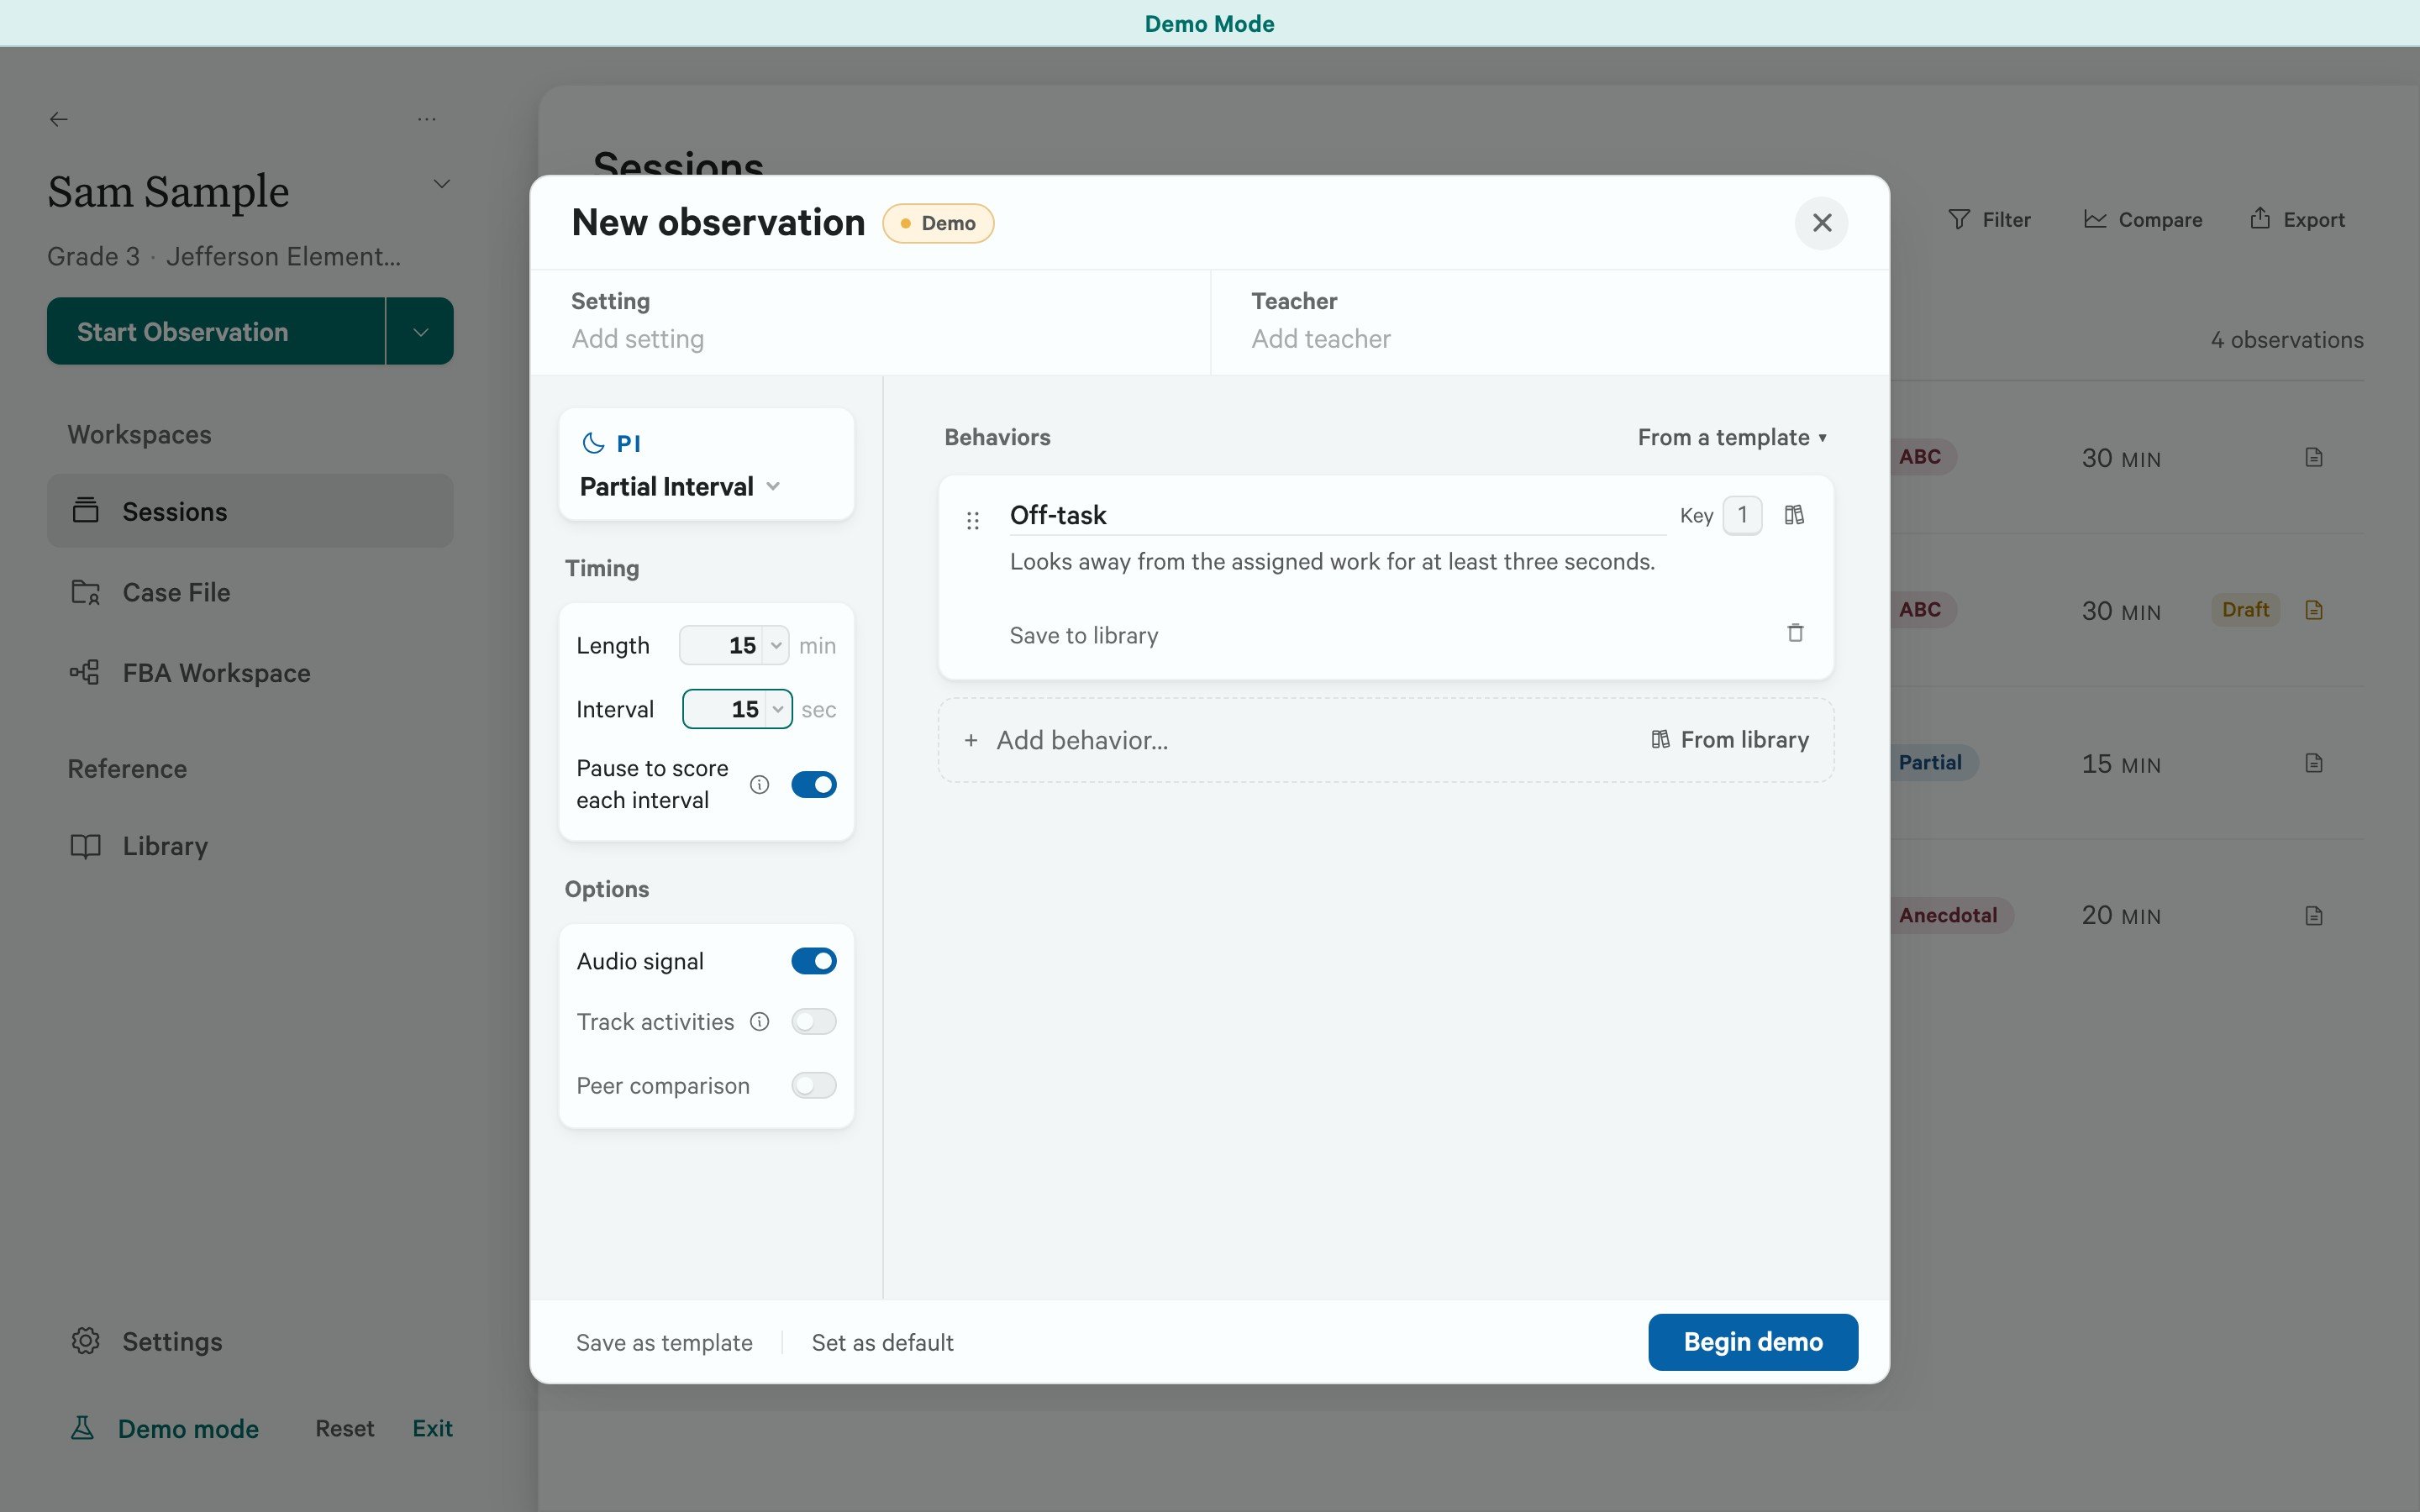
Set up the student, method, behaviors, and recording options before entering the recorder. The choices you make here determine the controls available during the observation and the measurements shown in Results. Open a student and select Start Observation. With the free Community plan, select New observation and enter the student’s name at the top of the setup window.
New observation setup with Partial Interval selected, a 15-minute length, a 15-second interval, Pause to score enabled, and an Off-task behavior definition.

Partial Interval setup in demo mode. Review the method and timing on the left and the behavior definition on the right before beginning.

Add the observation details

Select Setting to describe where or during what activity you are observing, then add the Teacher if useful. Press Enter or click outside a field to keep the text. The setting describes the observation as a whole. If you want to mark changes between activities during recording, turn on Track activities in the options on the left.

Choose a method

Select the method card at the upper left to change the recording method. If you change methods after beginning setup, review the behaviors and options again before continuing.

Define the behaviors

Enter the first behavior in Behavior name…. Use Add behavior… to add another. Beneath each name, describe the observable actions that count as that behavior. Use this definition to decide what to record during the observation. You can also use the library button to choose a saved definition. For Interval and Frequency recording, the Key beside each behavior is its recording shortcut. You can change it before starting. For other methods, use the shortcuts shown in the recorder. Most methods support up to five behaviors. Latency records one behavior per observation. Anecdotal recording does not require a behavior list. The other methods need at least one named behavior. For ABC, setup continues through three stages. Enter the behaviors, select Continue, then review the antecedent tags. Select Continue again to review the consequence tags. Adjust the tags to fit what you need to record. Use Back to revisit an earlier stage.

Set the timing

For methods with a Length control, select a preset or enter a length in minutes. Choose No limit if you want to decide when to end the observation. Anecdotal recording uses the length as a guide; you still end the session yourself. For Interval recording, set Interval in seconds. The interval must fit within the session length. Partial Interval and Whole Interval also offer Pause to score each interval. You can score while observing with this on or off. Turn it on to pause at each interval’s end, check the scores, and select Continue. Turn it off for intervals to advance automatically. Momentary Time Sampling pauses for you to score at each sampling point. For Latency, enter the event that begins each trial in Clock starts when. You can use From library as a starting point and edit it. This field is required before Begin becomes available. Latency has no session-length or trial-count control in setup. Decide how many trials you intend to complete and select End after the last one, including when you planned only one trial.

Choose recording options

The options shown depend on the method. Audio signal provides interval cues. Check the sound preferences in Settings before observing if you need a particular cue or a silent session. Track activities lets you select the current activity during recording and change it as the session progresses. Choose the activity set you want to use. Activity tracking is always on for ABC. See Track activity context for working with activity sets. Peer comparison is available for Interval and Frequency recording. For Interval recording, choose how often to observe the comparison peer. Peer intervals are scored separately from the student’s intervals. Choose a schedule that leaves enough intervals to observe the student.

Reuse a setup

If the student has a previous observation, a Start from card may offer its setup. Apply it, then check the method, timing, behaviors, and activity choices for the new session. Select From a template to load a saved setup. Review its settings before recording. Use Save as template to keep the current setup for another observation. To set the starting preferences for a recording method, use Set as default or the new-observation defaults in Settings.

Begin recording

Check the student, method, behaviors, and timing, then select Begin. For ABC, this appears after the consequence stage. If Begin is unavailable, check the readiness message beside it for a missing name, behavior, or invalid timing value. The recorder opens before the observation clock starts. Select Start when you are ready to observe.